Amplifying Analog Voltages with the LM358
05.03.2025
Elektronik | Funk | Software
Der Technik-Blog

05.03.2025

25.02.2025
25.02.2025

12.02.2025
There is also a video on YouTube for this article: NodeMCU ESP8266 WiFi Weather Station (German)
NodeMCU is an operating system for micro controllers. Mostly, the NodeMCU is seen as a separate microcontroller. Many MCU development boards have an integrated ESP8266 WiFi module. It is possible to use only an ESP8266 for this project, but the NodeMCU is much easier and more conformable. The NodeMCU can be programmed via Arduino IDE.
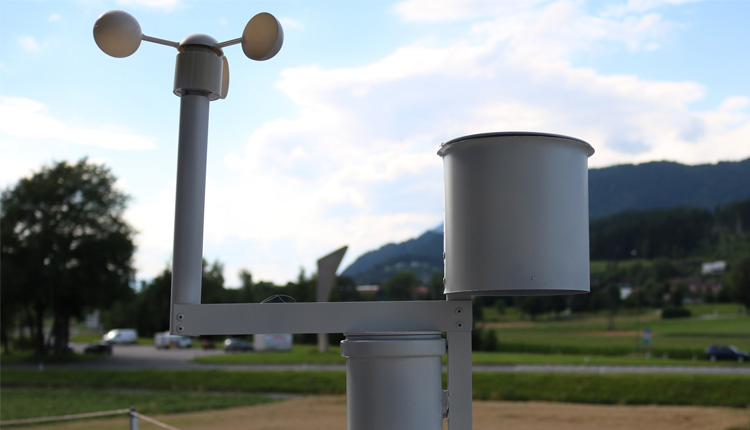
The WiFi weather station has almost the same structure as our Arduino weather station. However, this weather station is operated via an Ethernet shield and therefore it requires a LAN cable in addition to the power supply. For many, this project is an obstacle because almost nobody has a network cable in the garden. The WiFi weather station works with Wi-Fi and would even work completely wireless with a small photovoltaic cell. The BME280 multisensor is used as hardware. The BME280 works over the I2C interface and can measure temperature, air pressure and humidity. To measure wind speed, a conventional anemometer with a reed contact is used in this project. At each rotation, the anemometer gives a pulse, which is detected as an interrupt on the microcontroller. Between the input and the ground a 10K resistor is installed that prevents bouncing at the entrance. The ESP8266 captures this data and sends everything to a web server over HTTP. A PHP script is running on the web server, which processes the received data. Since the weather station is used outdoors, a corresponding weatherproof housing is required. The housing is mostly made of metal. A construction manual is available here (German only).

First the board and library must be installed in Arduino IDE. After that, the NodeMCU can be programmed. In the settings of the Arduino IDE, the URL for the board manager must be defined. The URL is:
http://arduino.esp8266.com/stable/package_esp8266com_index.jsonAfter that, open the Boardmanager, search for ESP8266 and install it. When the installation finished, it is necessary to install the Library for ESP8266.
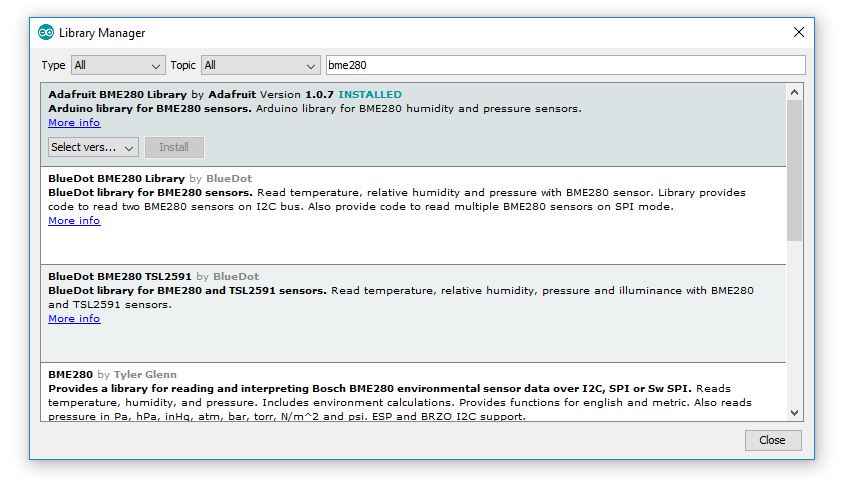
To install new libraries, click Sketch -> Include Libraries -> Manage Libraries. The Library Manager installs the Adafruit BME280 Library and the Adafruit Unified Sensor Library. Both libraries can be found in the Arduino folder.
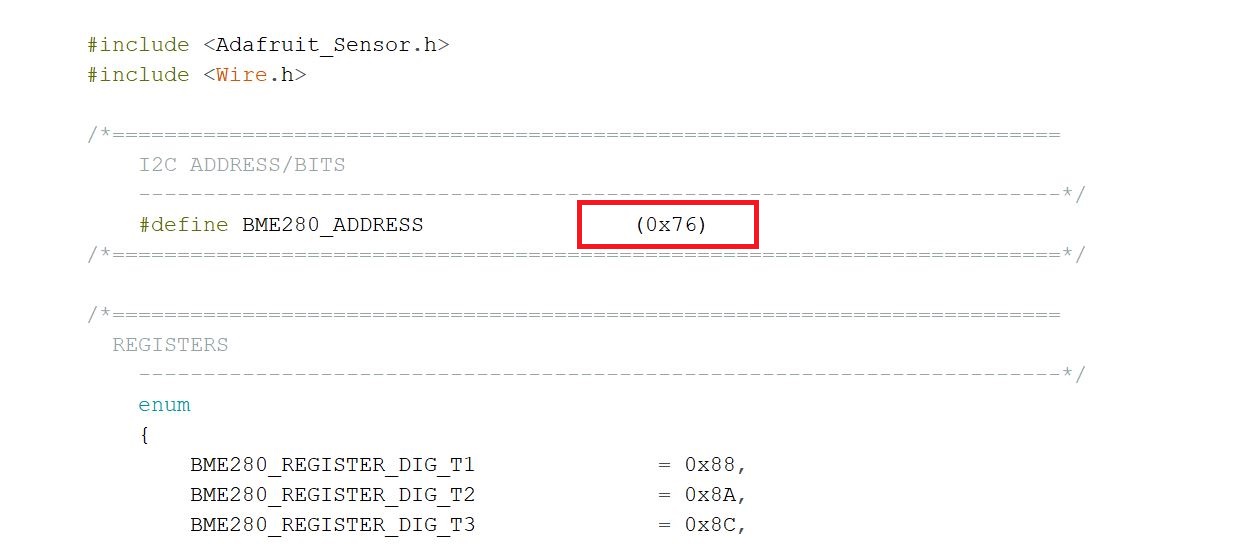
The Adafruit BME280 Library uses the address of the 0x77 sensor. If the original I2C sensor from Adafruit is not used, it may happen that the address is different. To clarify this, use an I2C-BUS scanner. The scanner tests all addresses and show the results in the serial monitor. The scanner can be downloaded here. In our project, we found out that the address of the BME280 is 0x76. Therefore, it was necessary to adapt the library. Under Windows, you can find the BME280 Library [Adafruit_BME280.h] in the Arduino Library folder. The parameter BME280_ADRRESS must be adjusted according to the result of the scanner.
The example code sends every minute an HTTP request to a specified web server. The Code sends via HTTP-Post the temperature, air pressure, humidity, wind speed and the runtime of the board in seconds to the Server. Before you can upload the code to the Arduino board, it is necessary to change the credentials for the WiFi network and the full URL to the PHP script.
The PHP script for the server is split into two files. The uplink.php file receives the data and creates a text file. The index.php file can read this textfile and display it in the browser.
The PHP script requires write permissions on the web server. Currently, this project does not support HTTPS.


This article is a short instruction how to install the CubeIDE from STM. After install, we create a simple blink example with the onboard led in c
read more
In this article, we'll show how you build a weather station with NodeMCU and ESP8266 that sends weather data over WiFi to a PHP server.
read more
05.03.2025
25.02.2025
25.02.2025
12.02.2025
AEQ-WEB ist ein Blog von Alex & Andi, der sich mit Elektronik, Funk & Software beschäftigt
read moreAEQ-WEB © 2015-2026 All Right Reserved