Amplifying Analog Voltages with the LM358
05.03.2025
Elektronik | Funk | Software
Der Technik-Blog

05.03.2025

25.02.2025
25.02.2025

12.02.2025

As with Arduino, STM also has an IDE to program the microcontrollers and development boards. STM developed the CubeIDE, which you can download after registering with STM. In this article, we´ll show you how to install the CubeIDE and how to flash a simple program on a Nucleo Board (STM32F446RE).
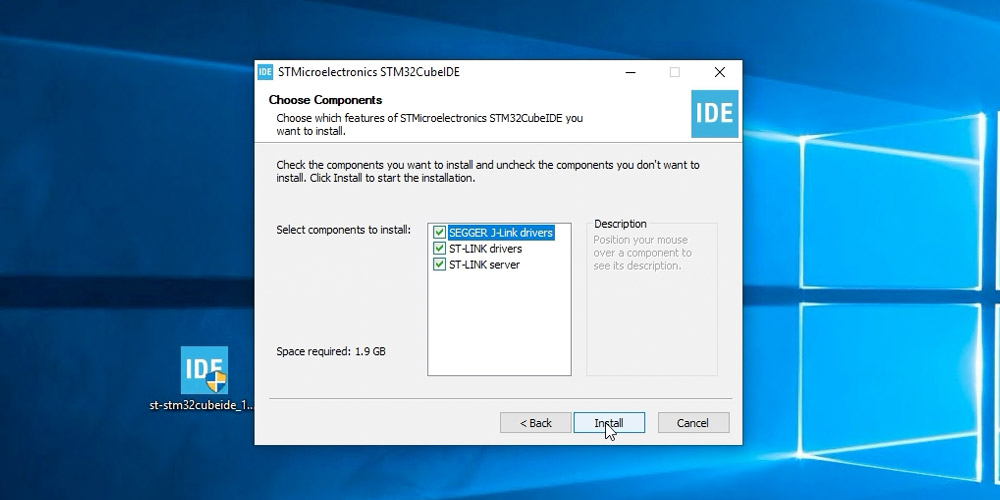
The CubeIDE can be downloaded after a short registration on STM´s website. The CubeIDE is available for Windows, Mac and Linux. The software installation is the same, as with any standard software by starting the setup EXE.
When the board is connected to the computer, the flash memory will be recognized immediately. No driver is needed for this. STM supplies the drivers with the CubeIDE. You will be asked during installation if you want to install the drivers. Recommended is the installation of all drivers.
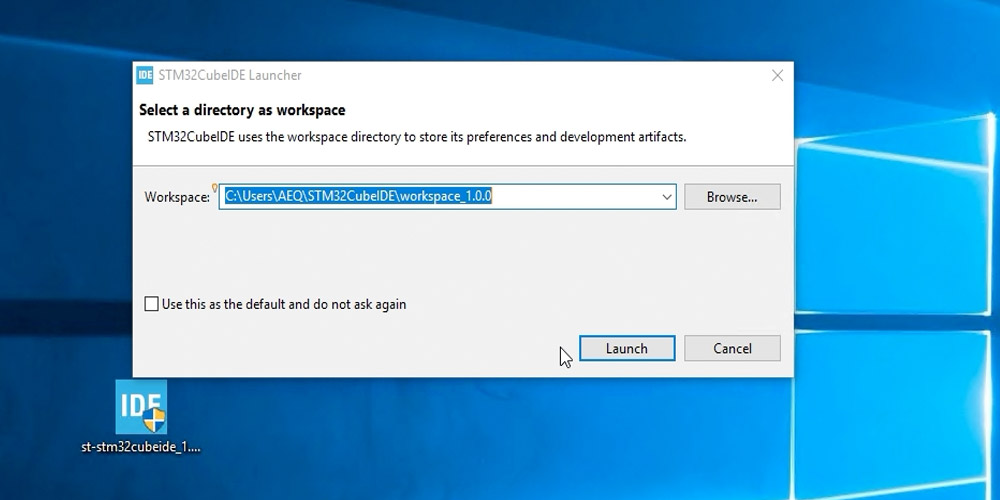
If the installation was successful, the program will start automatically. You will be asked for the location of the workspace. You can leave the suggested path here and use it for all projects.
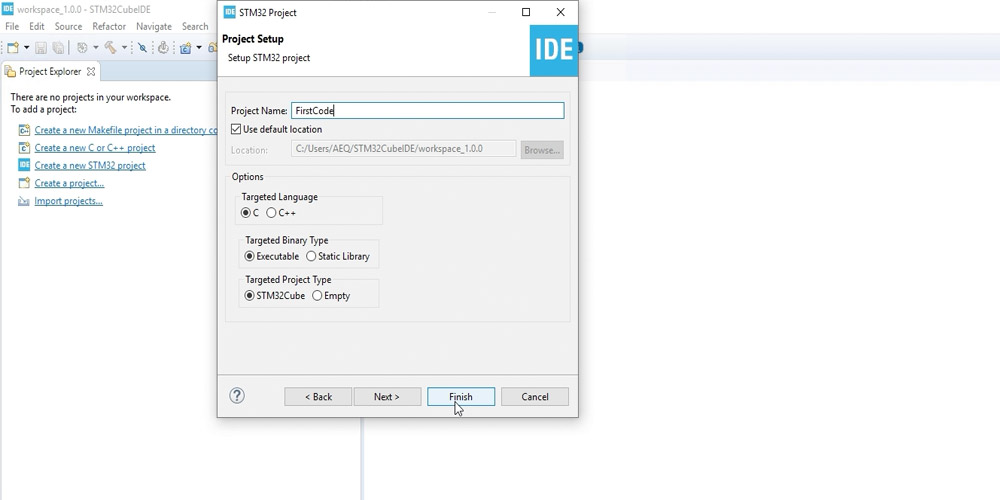
Before you create a new project in CubeIDE, you must define the board first. In our example, a Nucleo board is used with the following processor: STM32F446RE. The exact name of the processor can be found on the chip itself or on a sticker which should be located near the IC. The CubeIDE shows besides the type also some characteristics like flash size, RAM, number of IOs and the clock frequency.

After specifying the exact microcontroller, some programming parameters must be specified or confirmed. First, you have to define a project name. Then you have to choose the programming language between C and C ++. C ++ is a simpler language for beginners as it behaves similarly to the Arduino IDE. However, we chose C for the first project. The remaining two parameters can be adopted as proposed by the program.
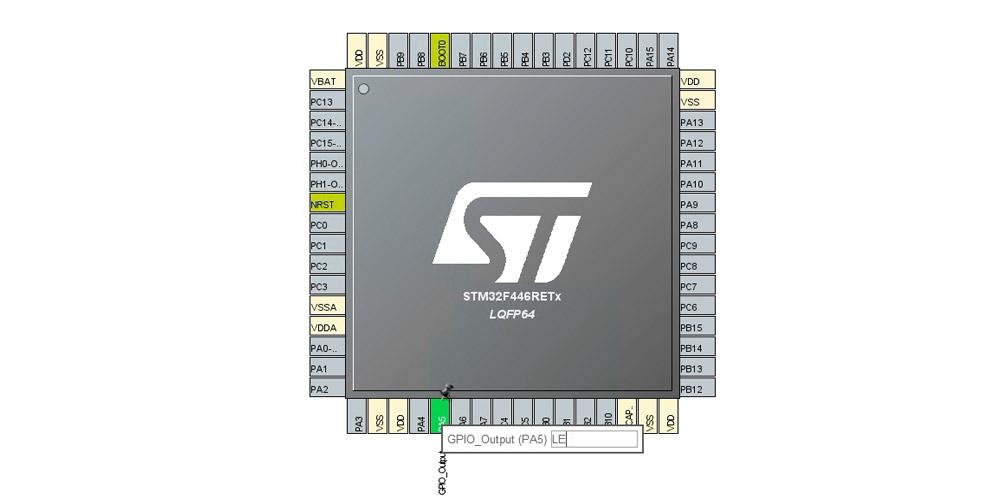
After the project has been created, a graphical overview of the chip is visible. In this view you can define the function of a single pin. We want to create a simple blinking example with the on-board LED, so pin PA5 must be defined as GPIO output.
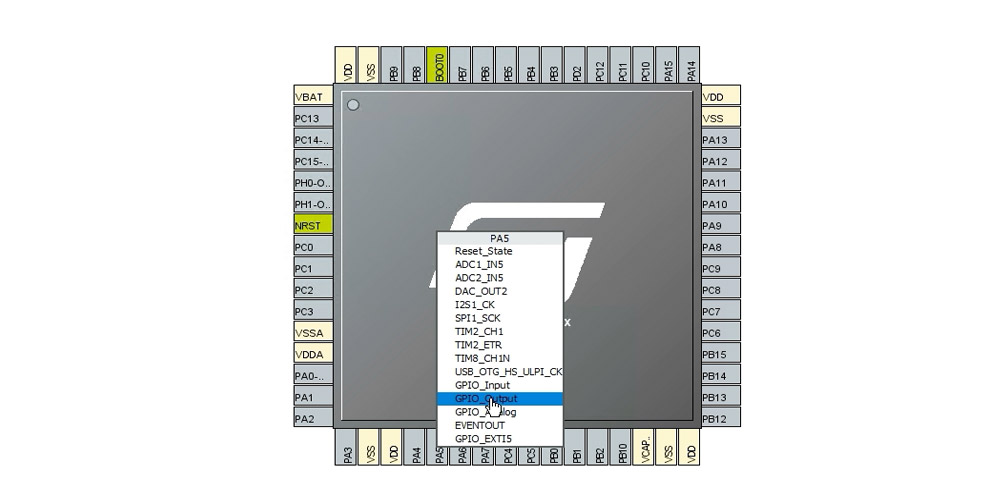
In the software, it is possible to give each pin a label. The label can be called via the source code instead of the pin, which responds in the background to the defined pin. In our example, the on-board LED on pin PA5 will be assigned as "LED".
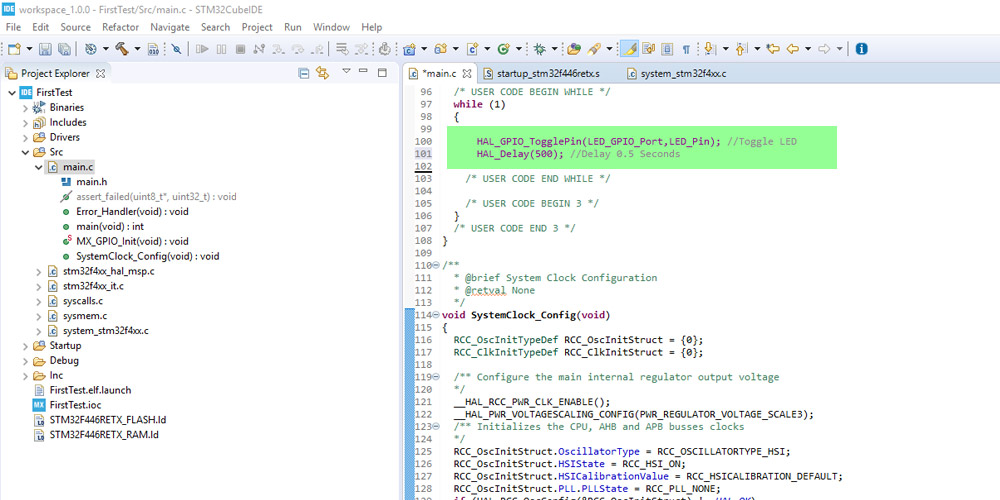
The project folder contains a subfolder (Src) with the file "main.c". This file contains the main program that we can load into the controller. To create the blinking example, the two green highlighted lines from the following screenshot must be copied into the while loop of the main file.
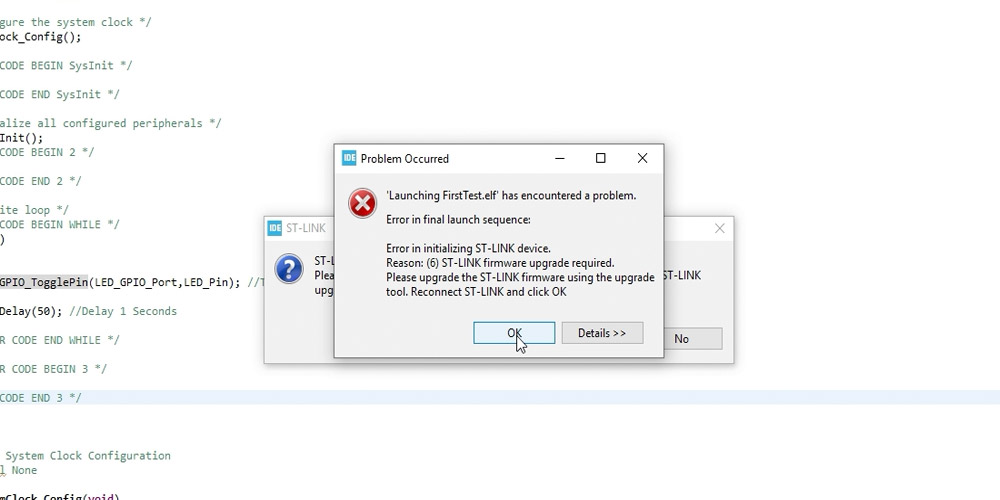
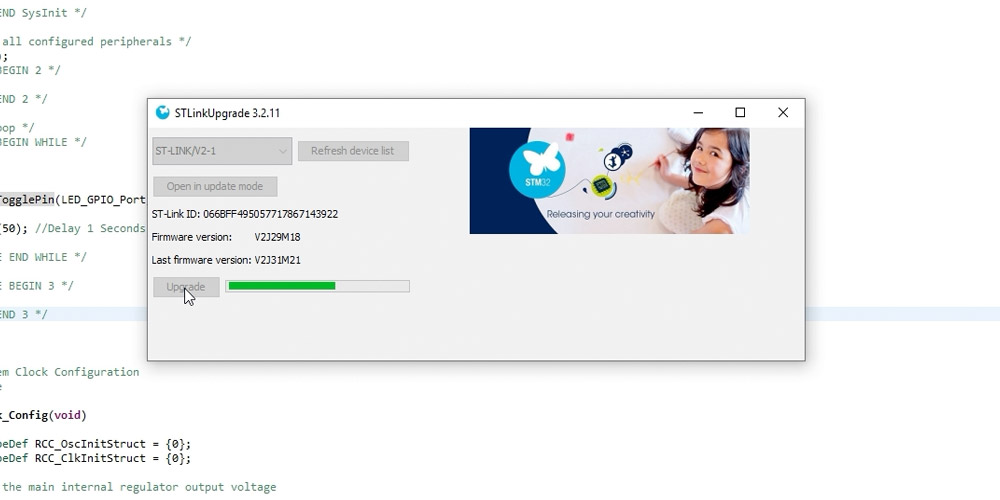
Depending on the firmware version of the board, it may happen that it is already outdated at the time of delivery. Then it is not possible to load a new program on the board via CubeIDE. The CubeIDE installs automatically the firmware upgrade on the board in this case.
The upgrade usually takes one to two minutes. After that the board restarts automatically and it should be possible to load a new program onto the board.
The debug button in the software uploads the program to the controller. In the status line, the IDE displays the current processes and informs whether the upload was successful or not. To start the new program press the reset button on the board and the LED should flash.

This article is a short instruction how to install the CubeIDE from STM. After install, we create a simple blink example with the onboard led in c
read more
In this article, we'll show how you build a weather station with NodeMCU and ESP8266 that sends weather data over WiFi to a PHP server.
read more
05.03.2025
25.02.2025
25.02.2025
12.02.2025
AEQ-WEB ist ein Blog von Alex & Andi, der sich mit Elektronik, Funk & Software beschäftigt
read moreAEQ-WEB © 2015-2026 All Right Reserved