Amplifying Analog Voltages with the LM358
05.03.2025
Elektronik | Funk | Software
Der Technik-Blog

05.03.2025

25.02.2025
25.02.2025

12.02.2025
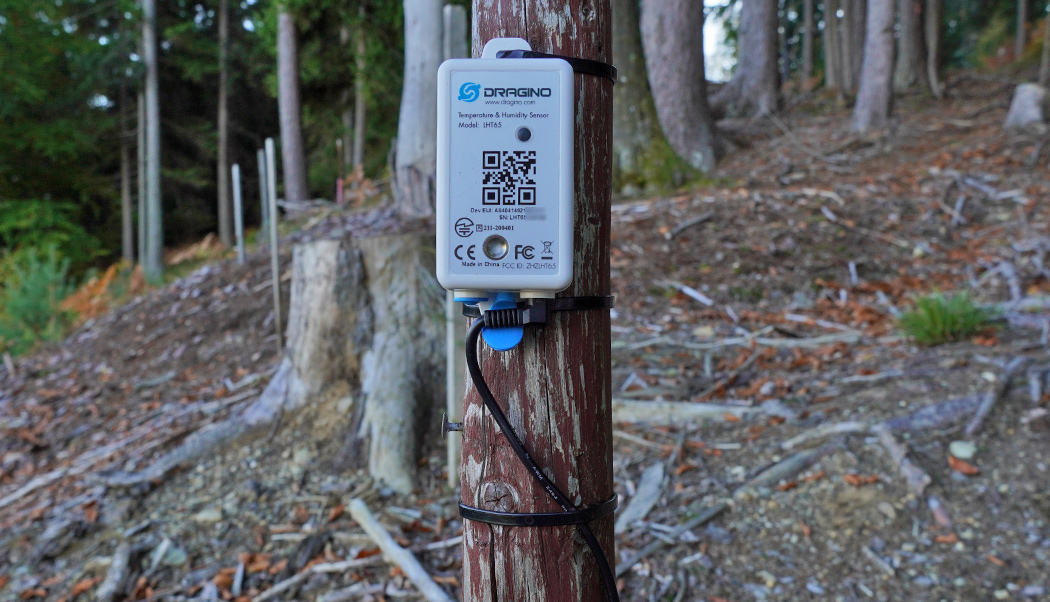
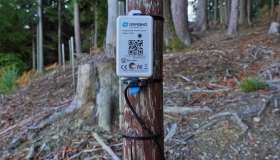
The LHT65 is a LoRaWAN temperature measurement station that consists of two internal sensors (temperature & humidity) and one external temperature sensor. The external sensor is the well-known DS18B20. The energy management of this node is very good, as it can be operated with a battery for many years and is therefore almost maintenance-free. This article is about the configuration of the LHT65 with the LoRaWAN-Network TTN V3 (The Things Stack) with OTTA. For OTTA, an 8-channel LoRaWAN gateway such as the MikroTIK LR8 (German Article) is recommended. If you operate with a single channel gateway such as a Dragino LG01 or LG02, you can only operate with OTTA in a special configuration. Therefore, it is better to use ABP for this configuration. An instruction for the configuration of the ABP operation can be found in the following article: Connecting LHT65 with TTN V3 (ABP).
The sensor has a built-in battery that should hold 8 to 10 years according to the manufacturer. Inside is a circuit board with an STM32 microcontroller, which is extremely energy efficient, and the well-known SX1276 LoRa chip from Semtech. On the rear is a 4-pin connector that can be used to update the firmware. In addition, a serial connection to the LHT65 can be established via this interface, which is used to configure the sensor. On the front is a multi-color status LED, a QR code and the type identification. On the underside there is a button and a jack connector for the external sensor (DS18B20).
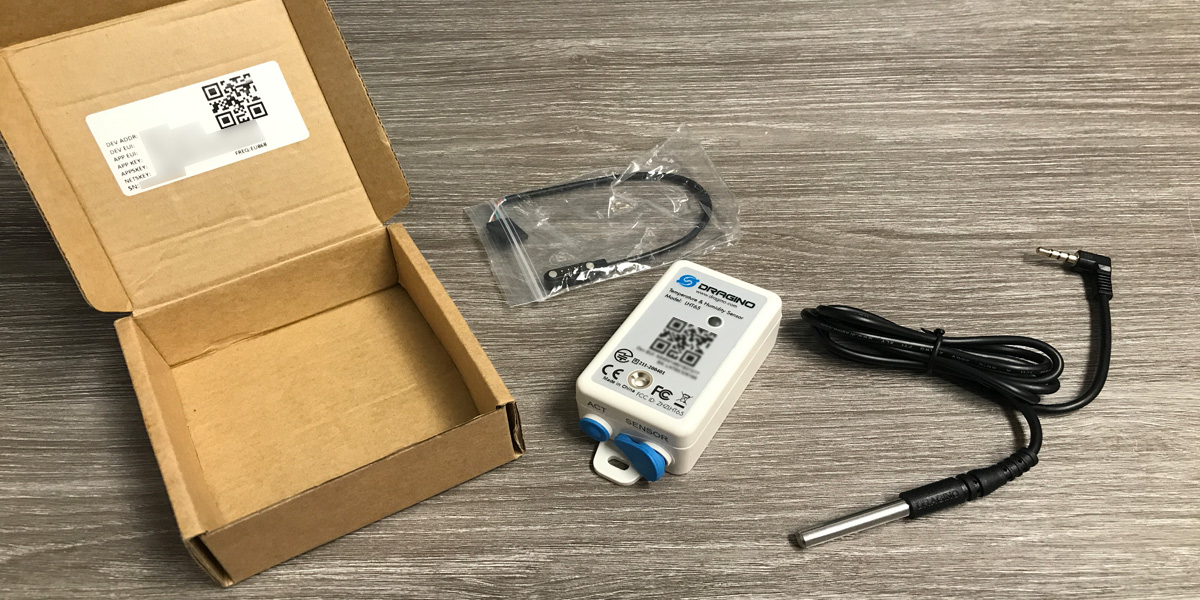
In the package there is a sticker with many keys, which are needed for the registration in the LoRaWAN network. Of course and if necessary, all keys can be changed in the device. In general this is not necessary with OTTA, because each node is delivered with unique keys. Each node can only be registered once with the manufacturer keys at TTN. The following keys are required for OTTA registration:
Before the registration of the actual sensor, an application must be created. The application includes all sensors, interfaces and the central decoder (payload formatter in V3). If additional sensors of the same type are commissioned later, they can be integrated into the existing application. The application ID and optionally a name and description can be freely selected.
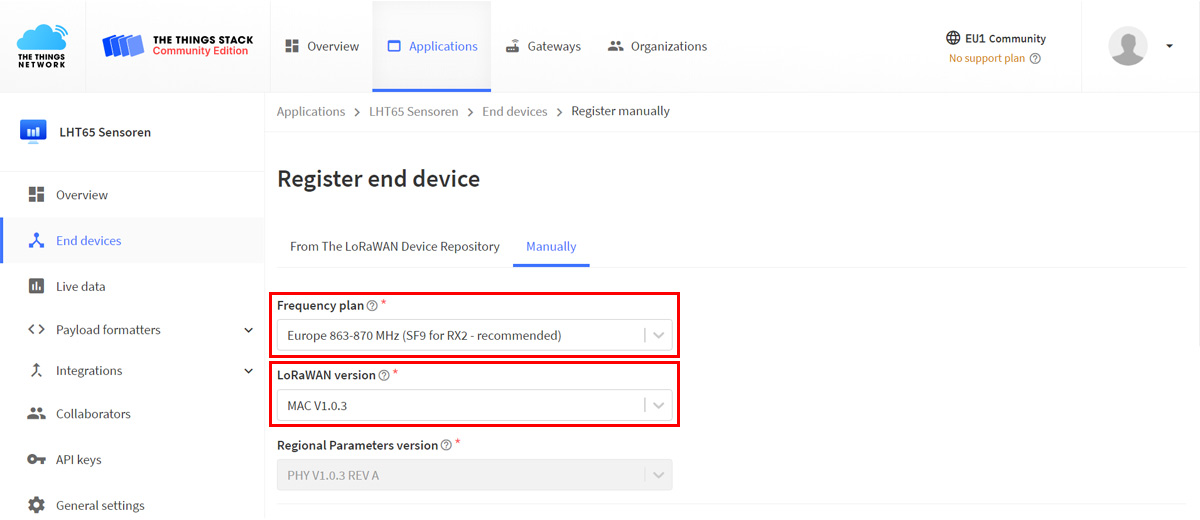
The sensor can be added either via the repository or manually. For this example, the manual option was selected, since this option can also be used to add sensors that do not exist in the repository. The following settings are selected in Europe for LHT65:

After clicking on "Register end device", the device will be created and displayed. The device can be activated in the next step.
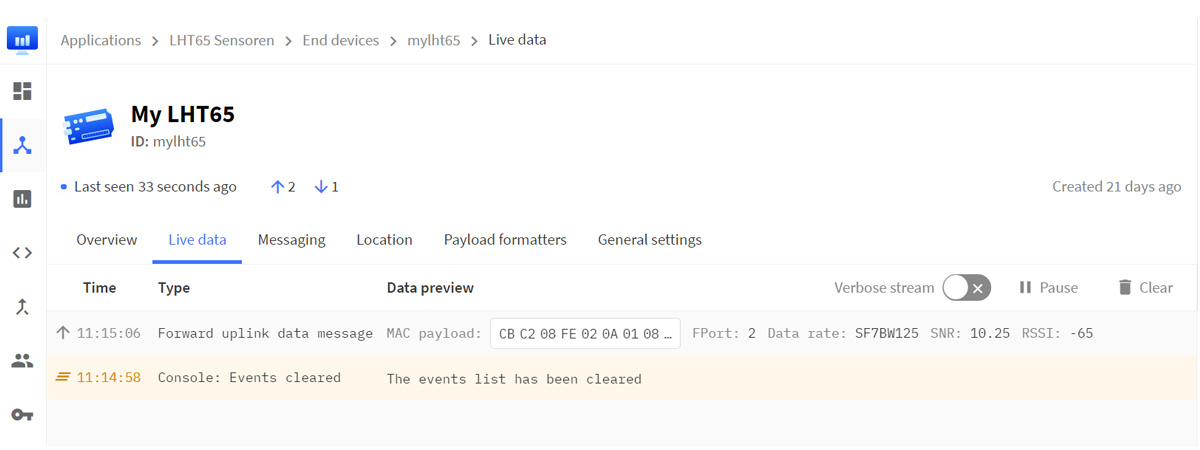
There is a button on the bottom of the LHT65 that is pressed for about three seconds to activate it. The green LED lights up continuously during this time. The JOIN request is sent and the sensor waits for the assignment of the keys from the network server. If the JOIN request was successful, the blue LED lights up briefly. Afterwards the first measured values are already sent to TTN. The following screenshot shows the hexadecimal payload:
The Uplink Payload Formatter (formerly Decoder) converts the payload encoded by the device back into the individual measured values. It is a JavaScript that uses bit-shifting to break down the hexadecimal payload array back into its individual components. More information and examples about the LoRaWAN payload can be found in this article (German only). The following screenshot shows a part of the payload formatter:
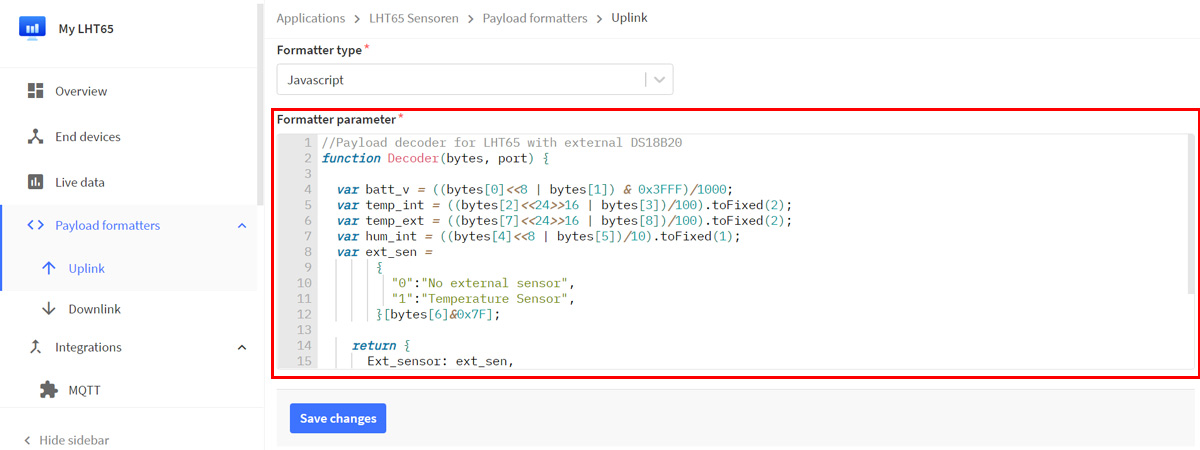
The following payload formatter (decoder) is inserted as Javascript:
//Payload decoder for LHT65 with external DS18B20
function Decoder(bytes, port) {

  var batt_v = ((bytes[0]<<8 | bytes[1]) & 0x3FFF)/1000;
  var temp_int = ((bytes[2]<<24>>16 | bytes[3])/100).toFixed(2);
  var temp_ext = ((bytes[7]<<24>>16 | bytes[8])/100).toFixed(2);
  var hum_int = ((bytes[4]<<8 | bytes[5])/10).toFixed(1);
  var ext_sen =
       {
         "0":"No external sensor",
         "1":"Temperature Sensor",
       }[bytes[6]&0x7F];

    return {
      Ext_sensor: ext_sen,
      BatV: batt_v,
      TempC_SHT: temp_int,
      Hum_SHT: hum_int,
      TempC_DS: temp_ext,
    };
}
Under the "Live data" tab, the decoded sensor data should now be displayed in addition to the payload:
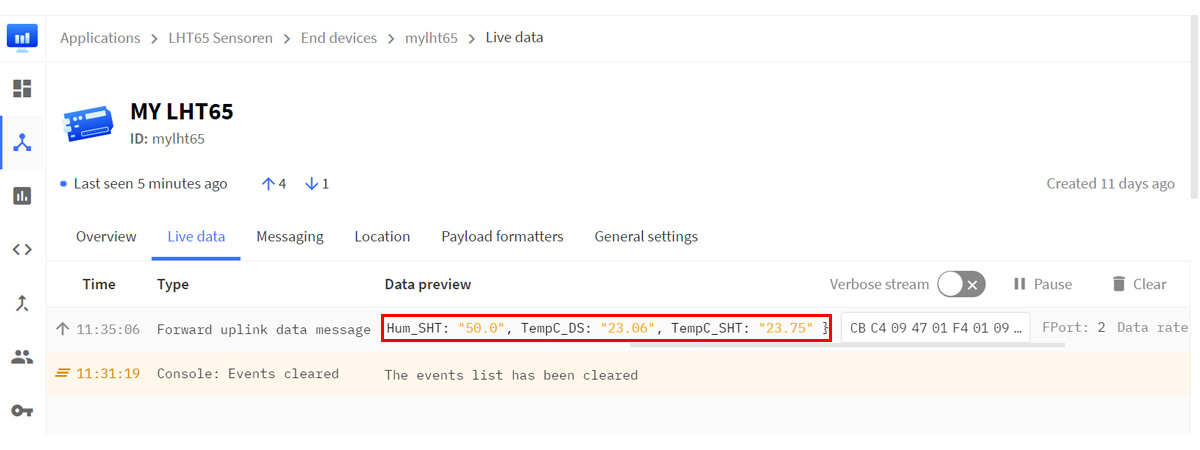
If you click on the line, a window opens where all data is displayed in JSON format. Here you can find, among other things, the signal strengths and IDs of the gateways that have received this data. Exactly in the same format the data is passed on to the HTTP integration (webhook).
The LoRaWAN network primarily only takes care of the transmission of the data packets. The user is responsible for the evaluation and storage of the data. TTN offers here many interfaces to different services, where the data can be forwarded after reception. Popular are MQTT connections or HTTP requests. The next article is about setting up a small PHP application that receives the data via HTTP mail from TTN, stores it in a database and displays it on a web page.

Each LoRaWAN end device has its own device address, which is either statically assigned (ABP) or assigned by the LoRaWAN network (OTTA)
read more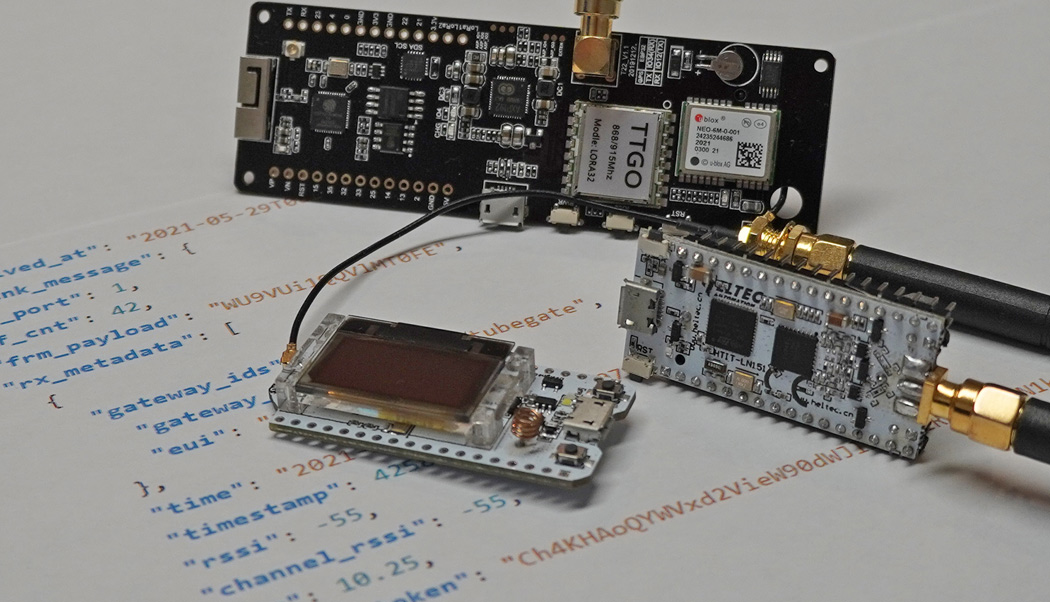
The Frame Counter (ABP) is an important security feature in the LoRaWAN network. This article is about the permanent storage of the current counter.
read more
05.03.2025
25.02.2025
25.02.2025
12.02.2025
AEQ-WEB ist ein Blog von Alex & Andi, der sich mit Elektronik, Funk & Software beschäftigt
read moreAEQ-WEB © 2015-2026 All Right Reserved