Amplifying Analog Voltages with the LM358
05.03.2025
Elektronik | Funk | Software
Der Technik-Blog

05.03.2025

25.02.2025
25.02.2025

12.02.2025
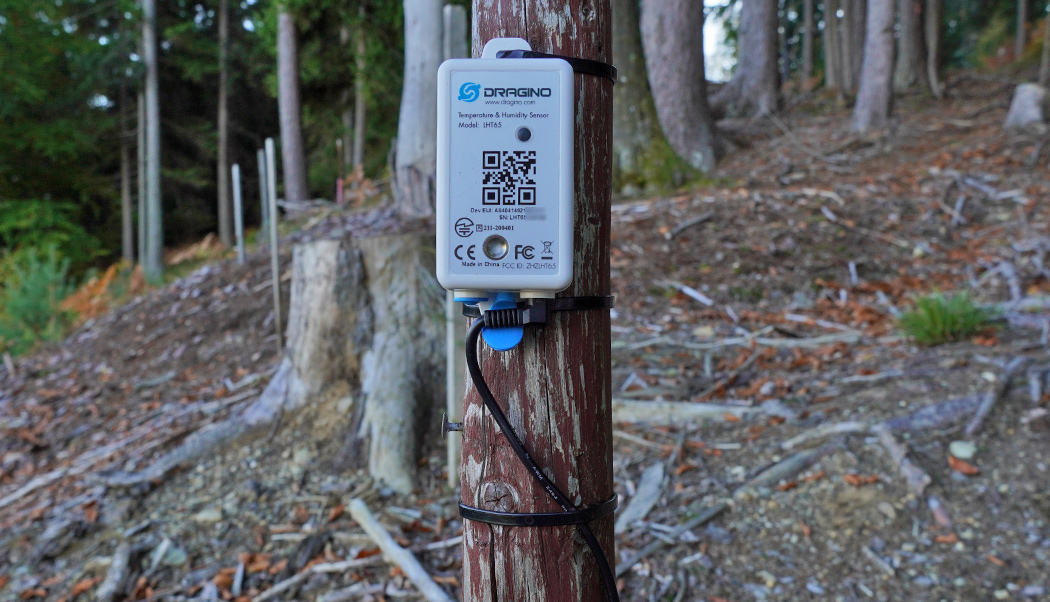
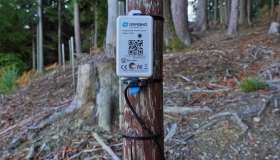
The LHT65 should be connected to a LoRaWAN network via OTTA if possible. All information about the registration of a LHT65 with OTTA can be found in this article (German only). If the sensor should be used in different LoRaWAN networks at the same time or if OTTA is technically not possible, the LHT65 can also be switched to ABP. This article is about the switch from OTTA to ABP, as well as the registration with TTN V3 (The Things Stack). The configuration described in this article also works with a single channel gateway such as the Dragino LG01/LG02 (German only).
Note: The sensor is preconfigured for OTTA at the factory. To switch the sensor to ABP operation, a USB-TTL-Adapter is required.
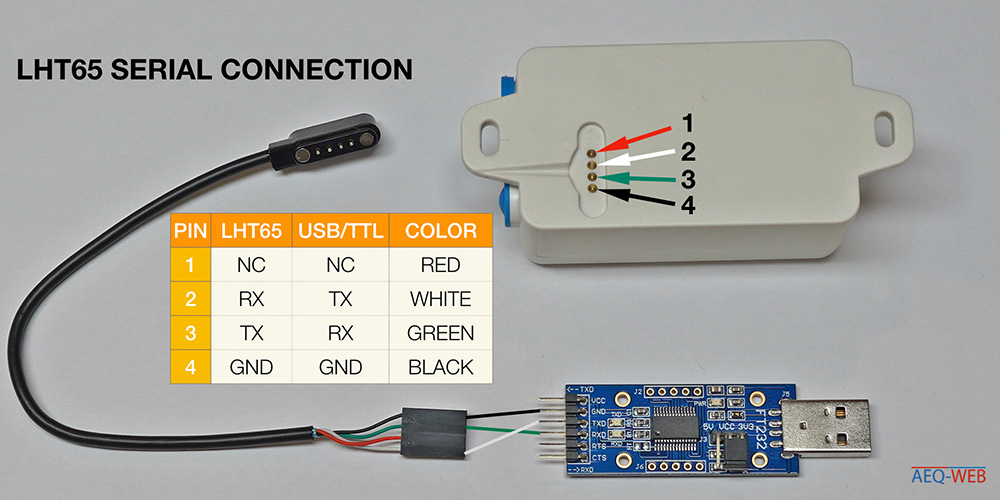
The sensor can be configured via the serial interface. A corresponding cable from the sensor to the jumper-wire connection is included in the shipment. To establish a connection with the computer, a TTL adapter (USB -> RS232) is required. In addition, the firmware can be updated via this cable (ST-Link Programmer required). Alternatively, the Arduino can be used as a serial bridge. The following graphic shows the pinout between sensor and RS232 adapter:
The sensor can be read out and configured via any terminal software. The keys for ABP can either be taken from the enclosed sticker or read out via the terminal. The second option is much more comfortable, because you can copy the keys from the terminal.
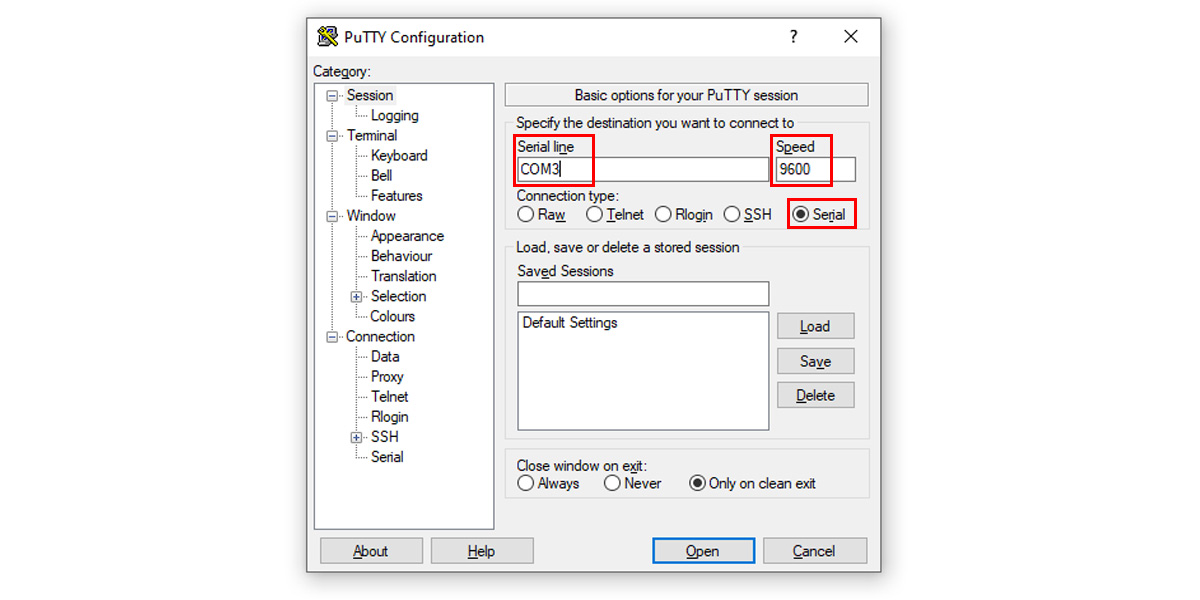
Putty is a popular simple terminal client for Windows/Linux, which supports SSH and serial connections. The following settings must be selected for a successful connection:
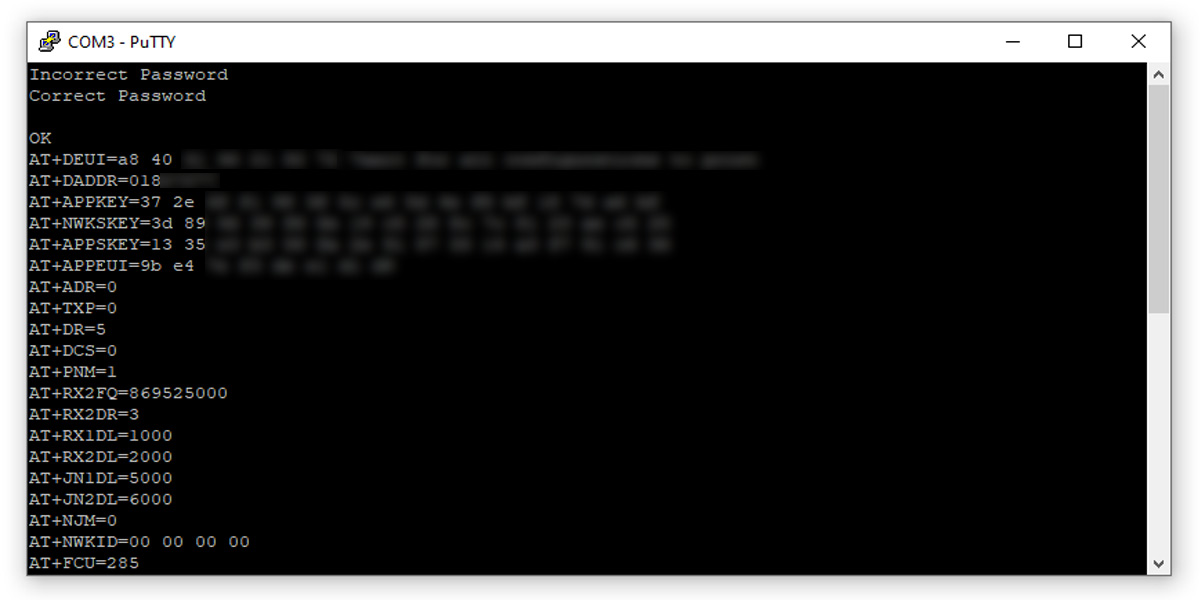
After opening the connection, type the command "AT" and press Enter to send. Now the following text should appear in the terminal: "Incorrect password".
Then type in the following password:
123456
With the return key the password is sent and in case of success "OK" will be returned. The following command displays the configuration and the keys required for LoRaWAN:
AT+CFG
The LHT65 is registered in the application under "End Devices". Basically there is a template for the LHT65, but you can also configure the sensor manually. The following parameters must be selected:
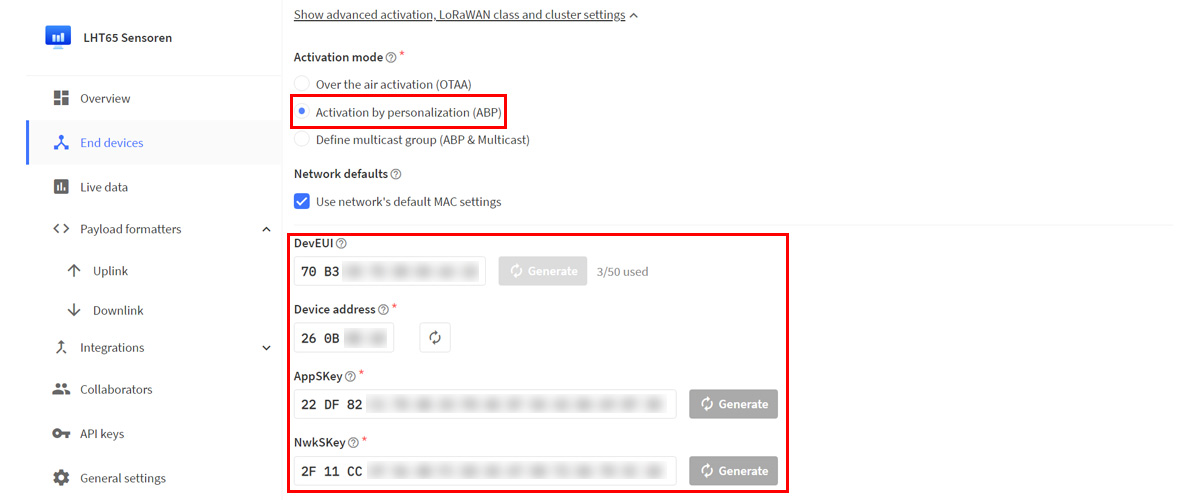
Click on "Register end Device" to register the device. TTN is now ready to receive.
The following commands can be inserted directly by a right click in the terminal and sent with the Enter key. Each command must be confirmed with OK:
4.1 Change to ABP:
AT+NJM=0
4.2 Disable Adaptive Data Rate:
AT+ADR=0
4.3 Set the data rate (5 = EU band):
AT+DR=5
4.4 Set the transmission interval (600 000 millis = 10 min):
AT+TDC=600000
4.5 Set the transmission frequency to 868.1 MHz:
AT+CHS=868100000
4.6 Restart controller:
ATZ
Generally, the LHT65 sends out a data packet immediately after the reset command. The hexadecimal payload should therefore already be visible in the console. The sensor should not be switched off after successful activation. For more information, see point 7.
The Uplink Payload Formatter (formerly Decoder) converts the payload encoded by the device back into the individual measured values. It is a JavaScript that decomposes the hexadecimal payload array back into its individual components using bit shifting. More information and examples about the LoRaWAN payload can be found in this article. The following screenshot shows a part of the payload formatter:
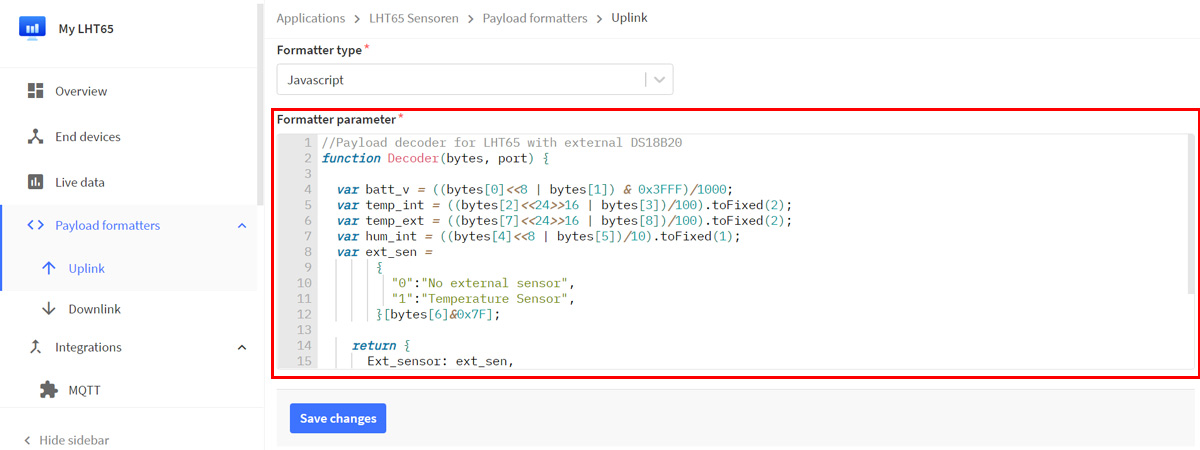
The following payload formatter is inserted as Javascript:
//Payload decoder for LHT65 with external DS18B20
function Decoder(bytes, port) {

  var batt_v = ((bytes[0]<<8 | bytes[1]) & 0x3FFF)/1000;
  var temp_int = ((bytes[2]<<24>>16 | bytes[3])/100).toFixed(2);
  var temp_ext = ((bytes[7]<<24>>16 | bytes[8])/100).toFixed(2);
  var hum_int = ((bytes[4]<<8 | bytes[5])/10).toFixed(1);
  var ext_sen =
       {
         "0":"No external sensor",
         "1":"Temperature Sensor",
       }[bytes[6]&0x7F];

    return {
      Ext_sensor: ext_sen,
      BatV: batt_v,
      TempC_SHT: temp_int,
      Hum_SHT: hum_int,
      TempC_DS: temp_ext,
    };
}
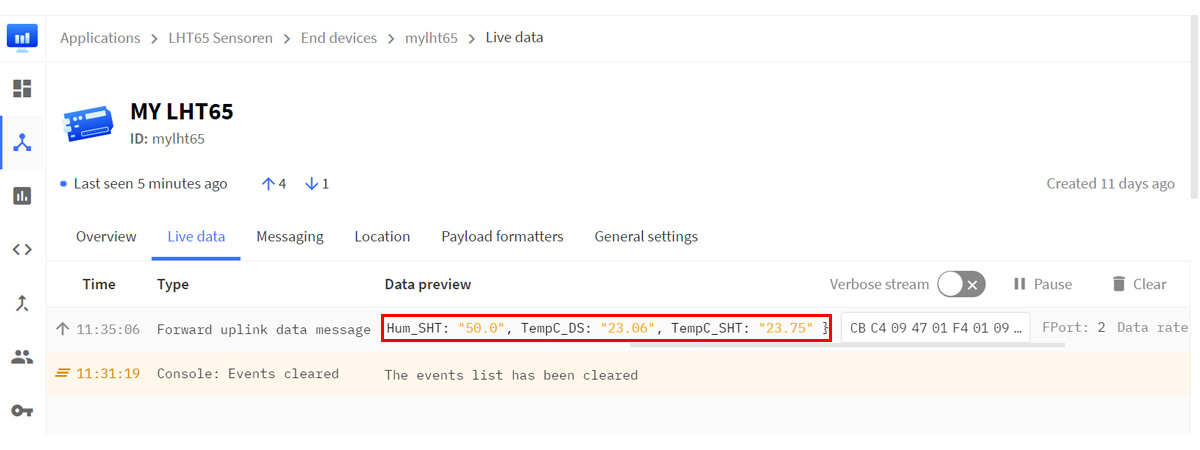
As soon as the next data packet arrives, the individual measured values are already decoded and displayed in plain text:
The frame counter is a security feature of LoRaWAN and prevents replay attacks. Both the end device and the LoRaWAN server run a counter that is incremented by 1 with each data packet. If the LHT65 is switched off, the frame counter starts again at 0 and is thus smaller than the counter value from the application. All data packets are rejected in this case and no error message will be displayed. However, it is possible to delete the frame counter manually. For the affected device, the option Resets Frame Counters can be activated under General Settings -> Network Layer -> Advanced MAC settings. Further information can be found in this article.
The LoRaWAN network primarily only takes care of the transmission of the data packets. The user is responsible for the evaluation and storage of the data. TTN offers here many interfaces to different services, where the data can be forwarded after reception. Popular are MQTT connections or HTTP requests. The next article is about setting up a small PHP application that receives the data via HTTP mail from TTN, stores it in a database and displays it on a web page.

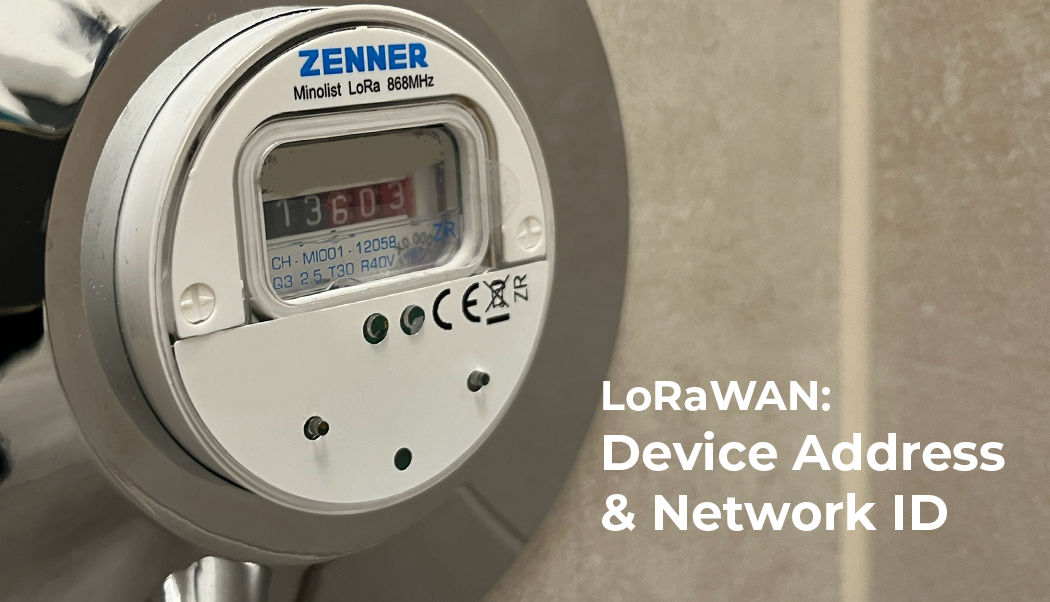
Each LoRaWAN end device has its own device address, which is either statically assigned (ABP) or assigned by the LoRaWAN network (OTTA)
read more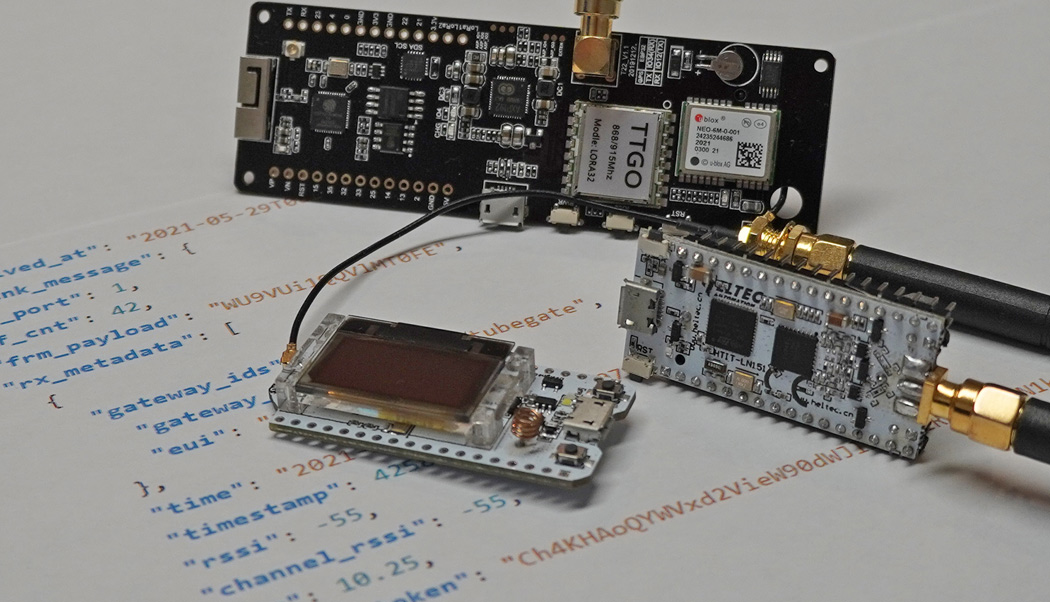
The Frame Counter (ABP) is an important security feature in the LoRaWAN network. This article is about the permanent storage of the current counter.
read more
05.03.2025
25.02.2025
25.02.2025
12.02.2025
AEQ-WEB ist ein Blog von Alex & Andi, der sich mit Elektronik, Funk & Software beschäftigt
read moreAEQ-WEB © 2015-2026 All Right Reserved