Amplifying Analog Voltages with the LM358
05.03.2025
Elektronik | Funk | Software
Der Technik-Blog

05.03.2025

25.02.2025
25.02.2025

12.02.2025
There is also a video on YouTube for this article: Arduino Smarthome - Control an LED Strip via WiFi & Ethernet via webinterface (German)
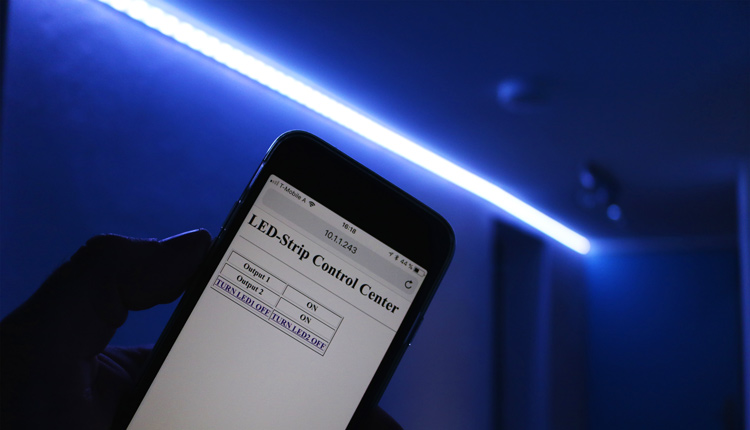
Smarthome is a very popular topic. Most commercial products are often very expensive and not compatible with everything, because some manufacturers use their own protocols. In this article we show how you can control an LED strip via a web interface. An Arduino Uno board works in the background, which communicates with the home network via an Ethernet shield. The power supply from the led strip is controlled via a relay card. The relay card is controlled via the digital I/O pins of the Arduino board.
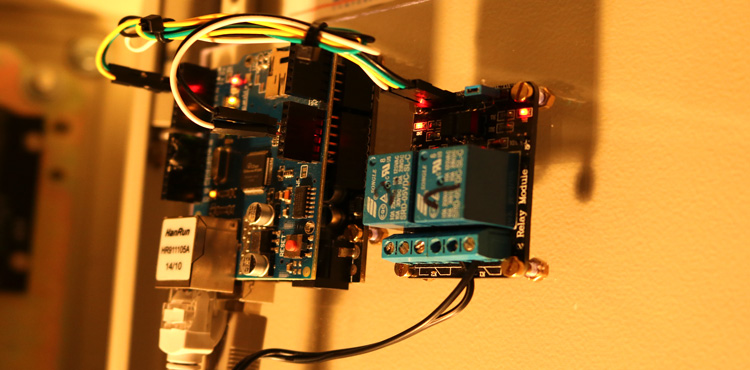
The LED strip is mounted in Aluminum profiles on the wall. It does not only look very nice, it also makes it easy to replace the strip and keeps it really strong the wall or ceiling. In principle, any LED strip can be used for this project, because the Arduino board does not power the LEDs with its own voltage. Thats the reason while we need a relay card. A relay works like a light switch in this project. When the relay becomes power, two contacts close in it and the energy can flow over it. If the relay has no voltage, the contacts are open and no energy can flow. The relay is used in a large number of circuits and can control high currents galvanically isolated. On the Arduino board we mount an Ethernet Shield. This is necessary for the network connection. Therefore, you need a network cable that is connected to a WiFi access point or a modem. If you enter the IP address on your smartphone or computer via the browser, you should see the web interface from the controller.
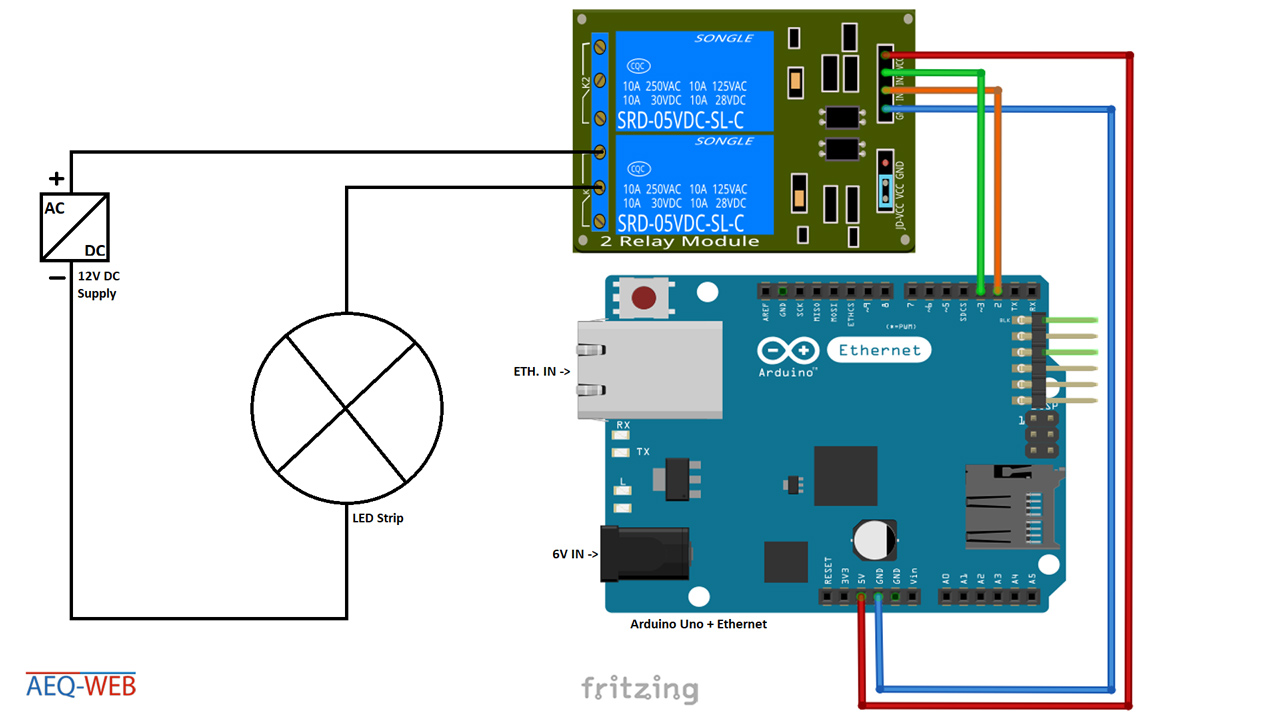
The software for the Arduino board does not need any external libraries. The Ethernet Shield should therefore work with the traditional existing libraries. It is important that some parameters are changed before you upload the software to the board. The addresses of MAC, IP, Gateway and Subnet must be adapted to the network environment. Since in most cases a fixed IP address is desired, so we have decided to use a static addresses. Basically, the rest of the code can be take over, except the I/O pins between relay board and Arduino were not wired according to our wiring schematics. Before you start the upload, all connections should already be connected. After that, you can enter the IP address of the Arduino board in your browser and you should see the web interface. After you click on "TURN LED1 ON", then the first relay should switch on and the LED strip should light now.


On this page we will show you how to make a data transfer with the CC1101 and an Arduino. Wiring plan and libraries are available on AEQ-WEB
read more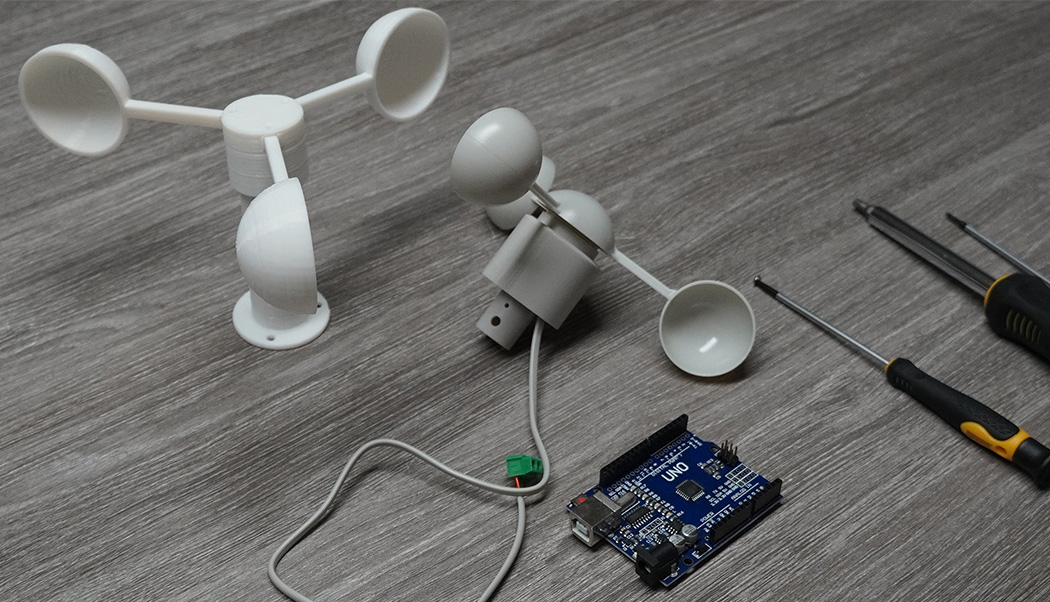
With a microcontroller like the Arduino, a small circuit and appropriate software the wind speed can be measured with an anemometer
read more
05.03.2025
25.02.2025
25.02.2025
12.02.2025
AEQ-WEB ist ein Blog von Alex & Andi, der sich mit Elektronik, Funk & Software beschäftigt
read moreAEQ-WEB © 2015-2026 All Right Reserved