Amplifying Analog Voltages with the LM358
05.03.2025
Elektronik | Funk | Software
Der Technik-Blog

05.03.2025

25.02.2025
25.02.2025

12.02.2025
There is also a video on YouTube for this article: Capacitive sensors - basics and how to use the proximity sensors with Arduino
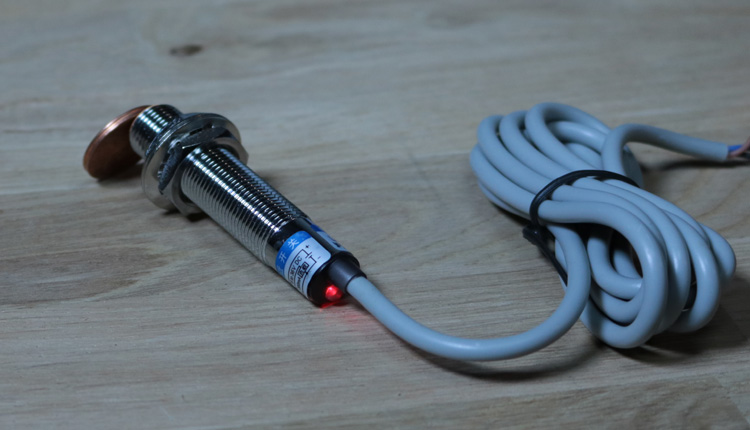
A capacitive sensor or proximity sensor detects capacities changes in the environment. The sensor reacts on various materials that have a certain conductivity. These mainly include metals and liquids. Some sensors also have the possibility to adjust the sensitivity. This can be done via a potentiometer or a button, with it the sensor can be teached to the capacity of the environment. The sensor comes from the industry, which therefore the most sensors work with 24 volts. The sensor is often used to detect filling levels in tanks, air bubbles in pipes or for detecting leaks. In addition, it can also be used as a metal detector, touch sensor or as a door contact.
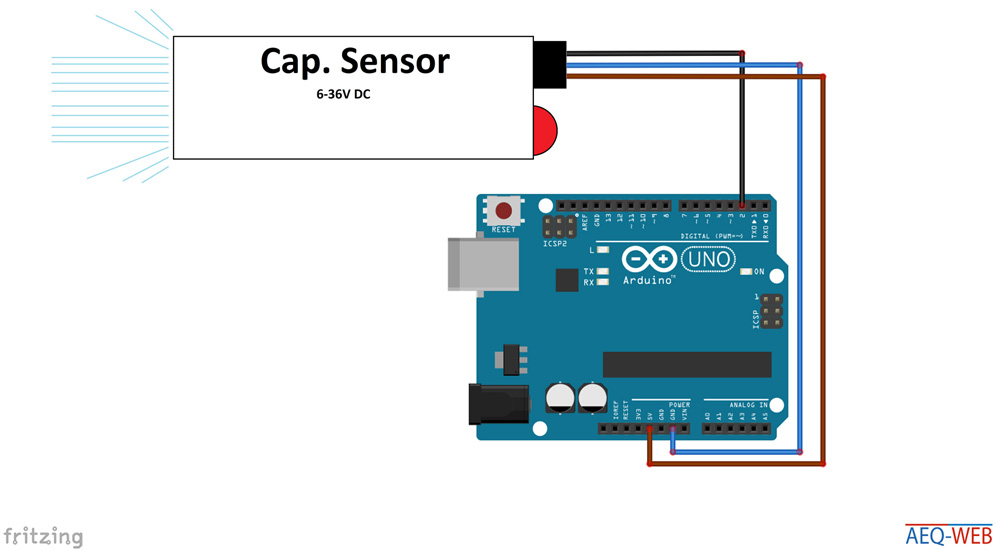
The sensor is also perfect useful for many Arduino projects. Some sensors are working in a wide voltage range from 6 to 36 volts. It will also work with 5 volts on the Arduino. In this case, you can use simply the supply voltage from the Arduino board and connect the signal line to a digital input on controller. The Arduino read the defined digital input pin and get the status of the sensor (HIGH or LOW).
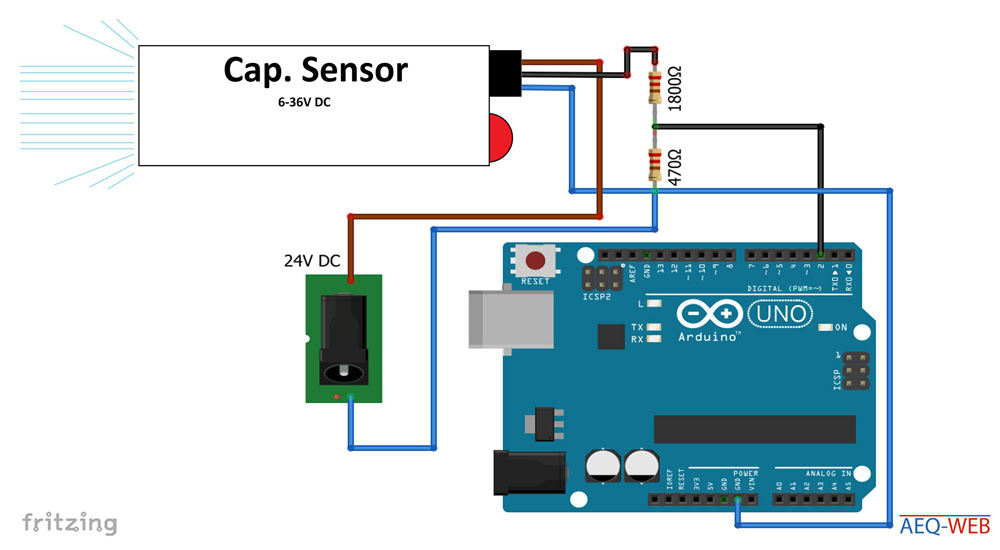
Many sensors only work with 24 volts. So that sensors with a switching level of more than 5 volts also work on the Arduino, a corresponding voltage divider must be built. The simple voltage divider have two resistors that convert the 24 volts to 5 volts. In this example we use a series connection of a 1800 ohm and a 470 ohm resistor. In the middle of the circuit we connect the digital pin of the Arduino.
The example code is relatively simple and works like the example code of a button. First the digital input pin is defined. In the main loop, the digital pin is queried and, depending on the status (0 or 1), the corresponding output takes place in the Serial Monitor. It will then indicate if the sensor is active or not.
int sensorpin = 2;

void setup() {
  Serial.begin(9600);
  pinMode(sensorpin, INPUT);
}

void loop() {
  int sensorstate = digitalRead(sensorpin);
  if (sensorstate == 1) {
    Serial.println("Cap. Sensor active");
  } else {
    Serial.println("Cap. Sensor not active");
  }
  delay(10);
}

The PT100 is a very precise industrial temperature sensor. This article is about building a measuring amplifier for reading a PT100 on the Arduino
read more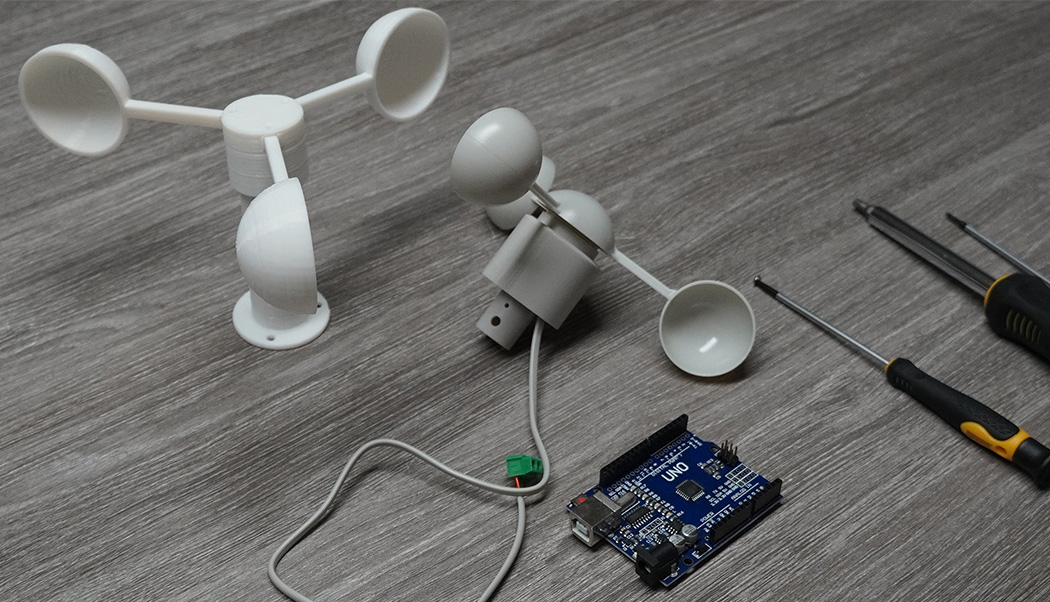
With a microcontroller like the Arduino, a small circuit and appropriate software the wind speed can be measured with an anemometer
read more
05.03.2025
25.02.2025
25.02.2025
12.02.2025
AEQ-WEB ist ein Blog von Alex & Andi, der sich mit Elektronik, Funk & Software beschäftigt
read moreAEQ-WEB © 2015-2026 All Right Reserved