Amplifying Analog Voltages with the LM358
05.03.2025
Elektronik | Funk | Software
Der Technik-Blog

05.03.2025

25.02.2025
25.02.2025

12.02.2025
There is also a video on YouTube for this article: NodeMCU ESP8266 - SSL secured HTTPS Request with Post & GET - without CA-Check
Most microcontrollers and development boards (Arduino, NodeMCU, ESP32, ESP8266, etc.) use the unencrypted HTTP protocol to communicate with a web server. This is very often wanted by the developer, because usually only control data are transmitted and it is not necessary to encrypt them. Today we have very often more and more problems when we are using HTTP instead of HTTPS.
For data transfer between webserver and microcontroller, HTTP has been used for over 10 years. There are many simple libraries for the protocol, and the resources on most microcontrollers are enough for this purpose. HTTPS is a must have for any good website today. More and more webservers or webspace providers only accept the HTTPS protocol. In some cases, firewalls already block HTTP and only allow HTTPS requests. Exactly this serious and progressive development forces us to adapt the data transmission method of the microcontroller.
Basically, the certification authority confirms the authenticity of the server. The client can determine if the requested server is actually this one. Our sample code ignores the server certificate. This means that the data transfer takes place via HTTPS, however, the confidentiality of the remote station is not checked. For most applications, the code is still suitable. In addition, the microcontroller reliably communicates even with a certificate error or a self-signed SSL certificate.
Our sample code works like an HTTP request, but over HTTPS. For this purpose, a URL must be defined at the beginning of the source code. During this call, parameters can be sent via POST and GET to the web server. This could be measured data from a weather station. The received response of the server will be converted into a string, which can then be processed relatively easily if necessary.
/*
HTTPS GET/POST Request for NodeMCU/ESP8266
Powered by: https://www.aeq-web.com
*/

#include <ESP8266WiFi.h>
#include <WiFiClientSecure.h>
#include <ESP8266WebServer.h>
#include <ESP8266HTTPClient.h>
///////////////////////////////BASIC SETINGS////////////////////////////
const char *ssid = "YOURNETWORK"; //Wifi Network Name
const char *password = "YOURPASSWORD"; //Wifi Network Key
const char *host = "www.aeq-web.com"; //Domain to Server
String path = "/test.php?get=test"; //Path of Server
const int httpsPort = 443; //HTTPS PORT (default: 443)
int refreshtime = 15; //Make new HTTPS request after x seconds
///////////////////////////////BASIC SETINGS////////////////////////////

String datarx; //Received data as string
long crontimer;

void setup() {
  delay(1000);
  Serial.begin(115200);
  WiFi.mode(WIFI_OFF);
  delay(1000);
  WiFi.mode(WIFI_STA);
  WiFi.begin(ssid, password);
  Serial.print("Connecting");
  while (WiFi.status() != WL_CONNECTED) {
    delay(500);
    Serial.print(".");
  }
  Serial.print("Connected: ");
  Serial.println(ssid);
}

void loop() {
  if(crontimer < millis()/1000){
    crontimer = (millis()/1000)+refreshtime;
    callhttps(); //
  }
}

void callhttps(){
  WiFiClientSecure httpsClient;
  httpsClient.setTimeout(15000);
  delay(1000);
  int retry = 0;
  while ((!httpsClient.connect(host, httpsPort)) && (retry < 15)) {
    delay(100);
    Serial.print(".");
    retry++;
  }
  if (retry == 15) {
    Serial.println("Connection failed");
  }
  else {
    Serial.println("Connected to Server");
  }
  httpsClient.print(String("GET ") + path +
                    "HTTP/1.1\r\n" +
                    "Host: " + host +
                    "\r\n" + "Connection: close\r\n\r\n");
  while (httpsClient.connected()) {
    String line = httpsClient.readStringUntil('\n');
    if (line == "\r") {
      break;
    }
  }
  while (httpsClient.available()) {
    datarx += httpsClient.readStringUntil('\n');
  }
  Serial.println(datarx);
  datarx = "";
}<?php
echo "GET: " . $_GET["get"]. " ";
echo "POST: " . $_GET["post"]. " ";
echo "Time: " . date("Y-m-d H:i:s");
?>
With the Flash Download Tool you can load exported programs (.BIN file) to an ESP32/ESP8266 without Arduino IDE.
read more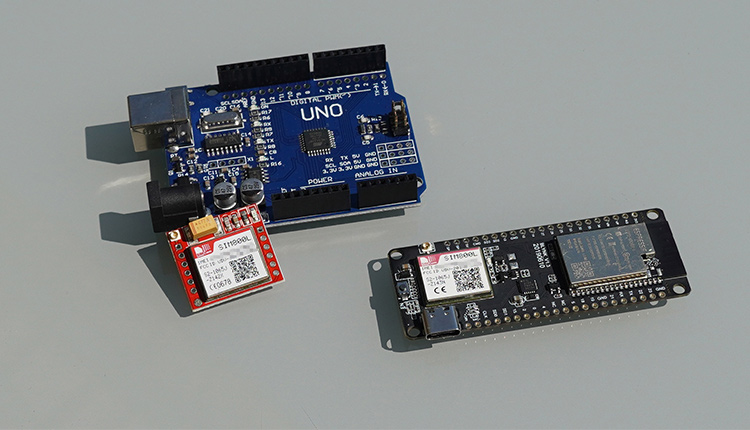
The SIM800 is a fantastic GSM / GPRS module. This article is about the commissioning and wiring of the SIM800 with an Arduino and the ESP32 (TTGO)
read more
05.03.2025
25.02.2025
25.02.2025
12.02.2025
AEQ-WEB ist ein Blog von Alex & Andi, der sich mit Elektronik, Funk & Software beschäftigt
read moreAEQ-WEB © 2015-2026 All Right Reserved